
Picture this: you’re a nonprofit or charity and have organised a fundraising campaign with a target goal in mind. Using Gravity Forms, you’ve set up a donation form and integrated GFChart to display a progress bar chart that indicates how much money you’ve raised towards your goal. You’ve also created a demographic- and “Why Support the Cause”-survey pie charts with GFChart. You are now IN NEED of the perfect solution to say “Thank you!” to your donors, and at the same time include these charts in a beautiful report that’s automatically delivered via email. The big question is: how do you hit two birds with one stone?

For this guide, let’s pretend you’re a health care centre and have organised a fundraising campaign to meet a target goal. Using Gravity Forms, begin by setting up a form used to accepting donations through your website.
In the next step you’ll learn how to create pie charts using demographic/survey data in your Gravity Forms form. But before we get to that, two more fields must be added to your donation form:
- Add a Drop Down field to your form and use the “Country” predefined choice
- Add a Radio Button field to your form with the four choices:
- I want to help.
- I’ve been through it.
- I’m an advocate.
- Prefer not to answer.


First, you need to set up a Calculation to get the total amount of donations raised. Calculations are created and published just like any other GFChart type.
From the Gravity Forms list page, click Charts/Calculations in the admin area to see the list of charts. Click the Add New button wherein a popup window will appear. Input the title and select the Source Form
 Following the sample scenario, set the chart/calculation title to Total Donations.
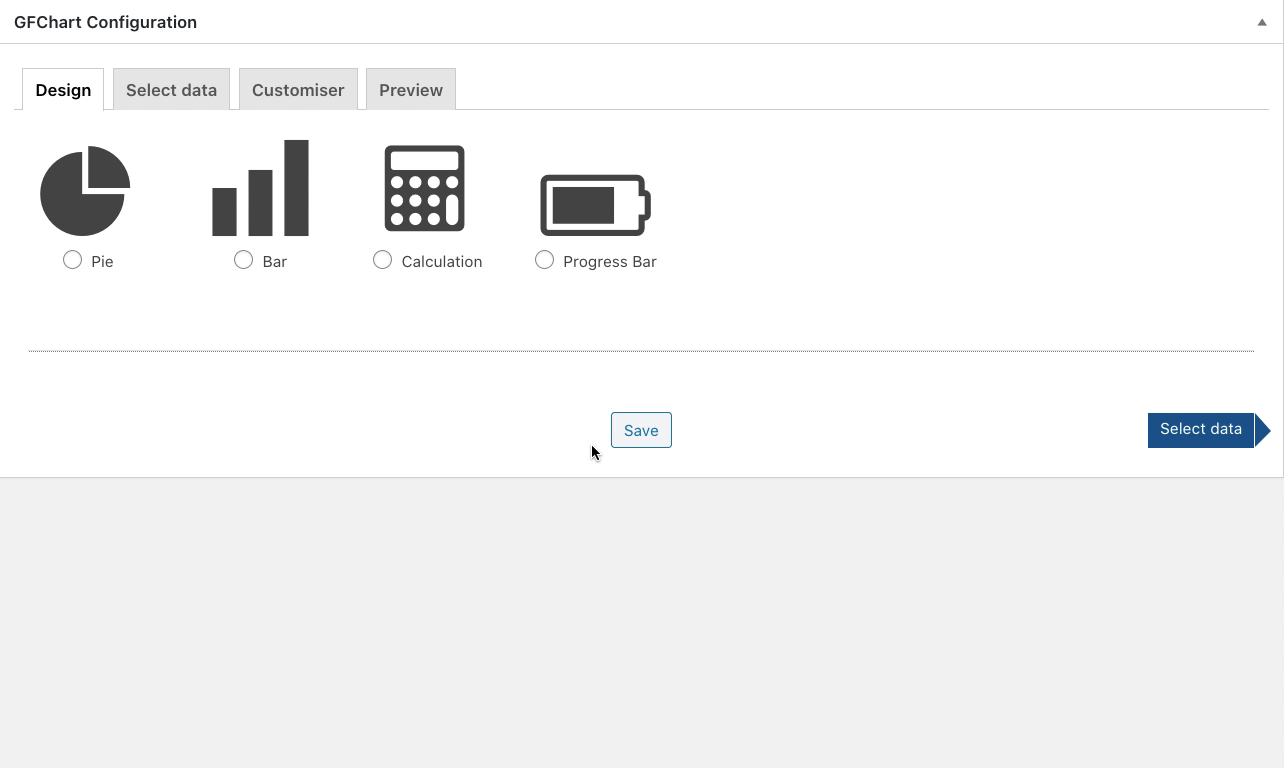
Click Create Chart/Calculation so you are redirected to the four-step process of setting up your GFChart:
- Under the Design tab, select which chart type to use. In this case, select Calculation.
- The Select data tab is where you set up how the chart/calculation will handle data such as source field, calculation type, and other optional filters you wish to include.
 Select the field to be added (Total amount of your donation), and set the calculation type to sum for the total amount.
 - The Customiser tab for each chart type is different, and for Calculations you can set the number format and rounding.
- Click on the Preview tab to review the chart/calculation. Check if you need to make further adjustments, otherwise hit Save.
 Set the number format to Currency to get the total in USD.


To display how much money you’ve raised and how far still from your target, it’s time to build a Progress Bar. A Calculation is required for a progress bar to be based on, which is why we created this first above 👆.
Proceed by setting up a new Chart/Calculation, but this time select Progress Bar.  Choose the calculation where the total will be based on (Total Donations) and input the value of your goal (10,000). Finally, select the Goal display format (Currency).
  Review your progress bar under the Preview tab and don’t forget to hit 👉 Save!
When we built the Gravity Forms form we added two additional questions. These will be used to generate two Pie graphs. Go ahead and create two separate Pie charts: Demographic segment (Country) and Survey (Why do you want to support this cause?), then assign the appropriate form field as the data source.
Under the Customiser tab, set the chart title, chart width / height, and add any additional code to suit. Then use the Survey Customiser to change the colours and rearrange the order of your segments.
 Take note: The survey customiser settings are only available once you’ve saved and refreshed the whole page.
Time to review your splendid pie charts. Click Preview and check if you’ve set them up correctly, then hit save. Neat! 👌


The initial process of setting up a report is the same as any other PDFs, and it differs only in the unique settings of each template.
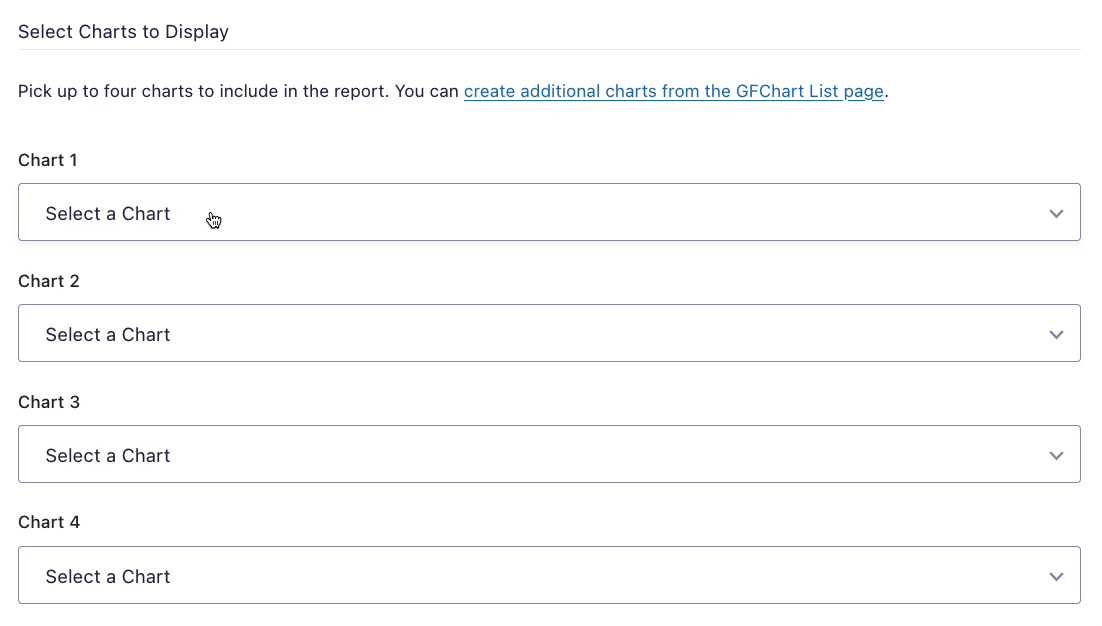
On the form list page, hover over the form you want to create a report for and click PDF. Add a new PDF template, and under the General tab, choose a report template and set the notification to whoever you want it delivered to.

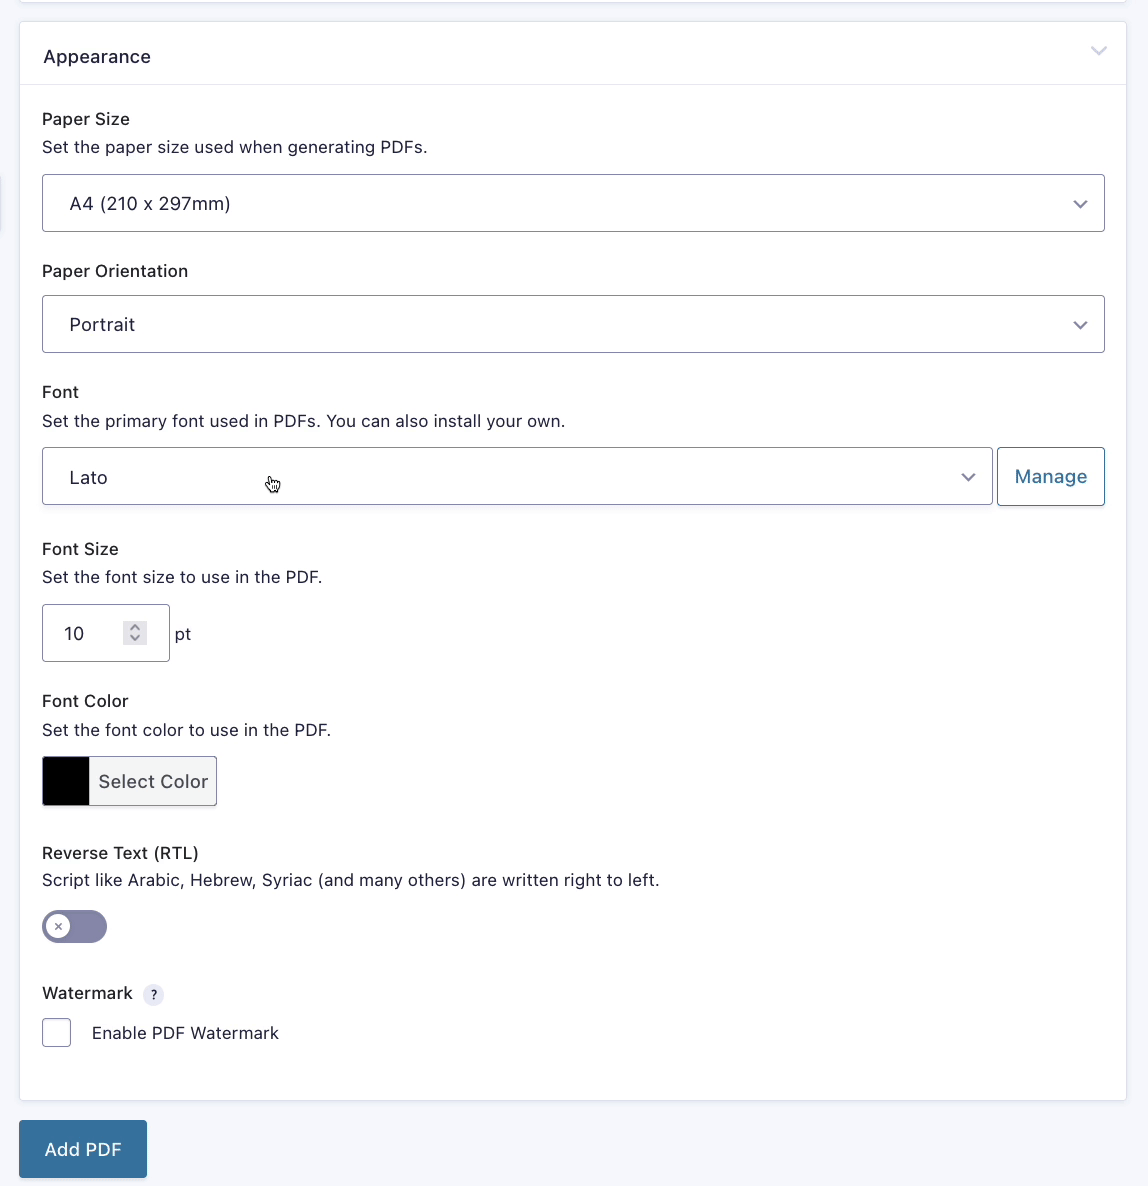
Set up the Appearance tab next, and make sure to select the font you want. If you don’t feel like changing the style, check the recommended font for that template and use it. You can also add a custom font by downloading a .ttf file and uploading it to Gravity PDF using the Font Installer.
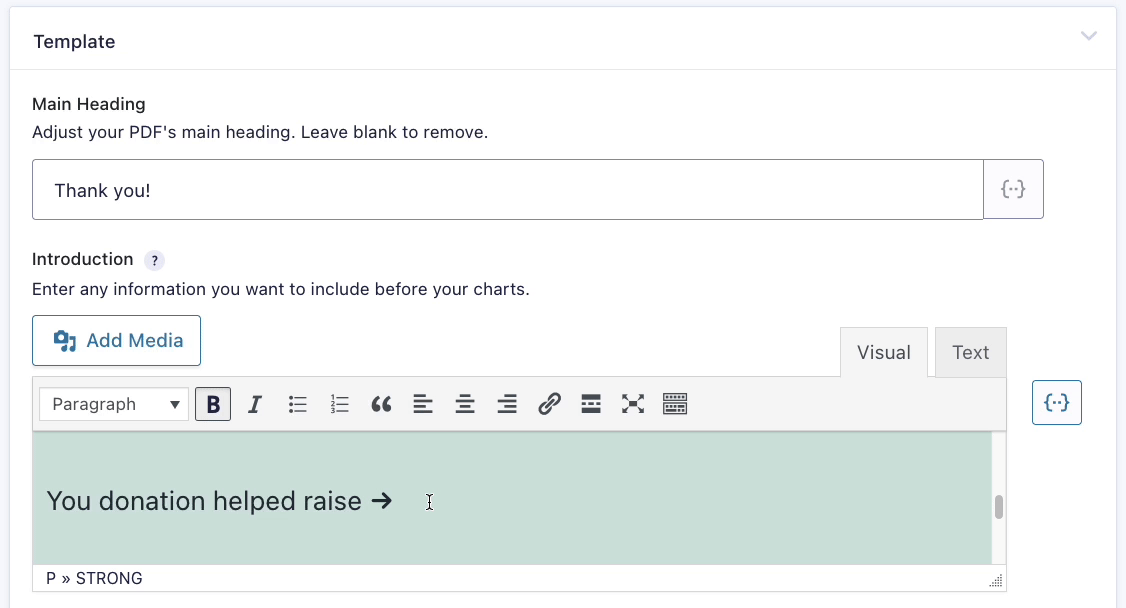
Moving on to the Template tab, set the Main Heading (“Thank you”)” and supply the necessary Introduction of your report.

The Introduction and Additional Info rich text editor supports merge tags, so you can include charts/calculations by putting the associated shortcode in these areas. If you plan to include charts using a shortcode, be aware that you have little control over the chart size. Since you want to let your donors know how much donations have been raised, paste the shortcode of the Total Donations calculation at the end of your report’s introduction.
Not all report styles support the option to add background images, but Kiama Standard includes a sidebar background image. Just make sure to use the optimal image size before adding your own.
 Finally, supply text and images (adjust sizes to suit) in the header/footer editor, and throw in any additional information to your report.
Almost there! Prepare to finish up by taking one final look at the amazing report you’ve created. Go to your form’s Entries List Page, hover over an entry and click on View PDF.
 Finish up by making appropriate tweaks to the report (if required), then give yourself a pat on the back for a job well done. What a beaut! You’re happy, your donors are happy. We all are! Awesome. 👍
